The DIY market in the US is estimated to be over $677 billion. The figures come from the sale of hardware and building materials, paint and wallpaper supplies, bathroom hardware, tools, floor covering, garden and lawn tools, and heating/cooling supplies. DIY plumbing fixes are one of the primary contributors to the industry.
Table of Contents
- Introduction to DIY Plumbing Fix
- Essential Tools for DIY Plumbing Repairs
- Common DIY Plumbing Fixes
- When to Call a Professional
- Contact Us for Professional Plumbing Services
Introduction to DIY Plumbing Fix
Have you ever struggled with a leaking tap until you wished you had the knowledge to fix it? You’re not alone.
Knowing home plumbing basics comes in handy for every homeowner. From saving you money to preventing major plumbing nightmares, prolonging the life of your plumbing system, and giving you peace of mind, there are countless benefits of learning plumbing fixes.
The Bay Area homeowners face unique challenges. According to the San Francisco Chronicle, San Francisco’s homes are among the oldest in major U.S. cities. This makes Bay Area plumbing fixes challenging for homeowners sometimes.
Additionally, the area’s water-saving initiatives complicate plumbing issues further. Fortunately, you can do so much with a bit of plumbing knowledge. This article explores practical DIY plumbing tips (do-it-yourself) for every Bay Area homeowner.
Let’s get started.
Essential Tools for DIY Plumbing Repairs
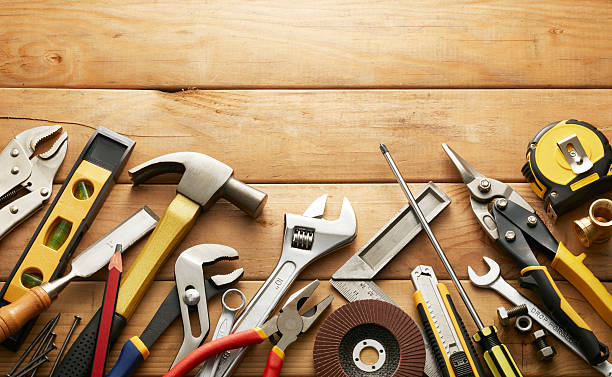
Having the right tools is the first and most crucial step if you’re keen on tackling basic plumbing issues yourself. While some advanced plumbing tools are meant for licensed plumbers, a basic toolkit is all you need to handle minor problems.
Some of the essential DIY plumbing equipment every Bay area homeowner should have are as follows:
- Plunger: A must-have tool for unclogging toilets and sinks. It is your first line of defense against minor clogs that you should have in your bathroom.
- Pipe wrench: Your go-to tool for gripping, removing, assembling, and dissembling rusty pipes and fittings. Also known as a plumber’s wrench, you can use it to tighten or loosen your pipes.
- Plumber’s snake: This tool is instrumental in clearing more serious blockages that a plunger can’t tackle.
- Plumbers’ tape: As the name suggests, a plumber’s tape helps in enhancing a watertight seal when screwing showerhead joints and other fixtures.
- Tongue and groove pliers: A list of plumbing tools for homeowners is never complete without these special pliers. Made with a slip-joint design, tongue and groove pliers are helpful for clamping, gripping, turning, loosening, and tightening bolts and nuts.
- Toilet Auger: Appropriate for removing more stubborn obstructions from your toilet.
- Basin wrench: The basin wrench’s clamping jaw helps plumbers grab and turn fasteners and bolts underneath your kitchen or toilet sink basin.
- Hacksaw: A hacksaw isn’t only for carpenters; it’s an essential plumbing tool for cutting through bolts, screws, nuts, and drainage pipes.
Common DIY Plumbing Fixes
1. Fixing a Leaky Faucet

Tackling a leaky faucet is among the most common plumbing problems for homeowners. Leaky faucets resulting from broken-down O-rings or washers can cause severe water wastage, worsening the Bay Area water problem.
Here’s the step-by-step guide on how to fix leaky faucets:
Tool and materials required
- Buckets or towels for catching water
- Cartridges, O-rings washers, and other replacement parts
- Basin wrench or adjustable wrench
- Plumber’s tape (optional)
- Philips or flathead screwdriver
- Penetrating oil (optional for over-tight screws)
Instructions
Step 1: Disconnect the water supply
Find the shut-off valves under your sink and turn them clockwise to cut the water supply. Alternatively, disconnect your home’s main water supply if you don’t have shut-off valves.
Step 2: Drain off the pipes
Turn off the water supply to your pipes by opening the faucets.
Step 3: Plug the drain
Close the drainage outlet to prevent small nuts, screws, and washers from being washed down the drain.
Step 4: Identify your faucet type
Check if yours is a compression faucet with cold and hot water handles, commonly found in older homes. Also, confirm if it’s a ball, ceramic disk, or cartridge faucet. While the repair process varies depending on the faucet, most use the following steps.
Step 5: Remove the faucet’s handle
Remove the screw that fastens the handle using a screwdriver. Use a flathead screwdriver to loosen a decorative cap securing the handle. Once the screw comes off, you can effortlessly remove the faucet handle.
Step 6: Check out the O-rings and washers
After unscrewing the faucet handle, examine the O-rings and washers for any signs of wearing out, which could be causing the leaks. Unscrew the screws securing the washers and replace worn-out O-rings/washers with new ones.
Step 7: Reassemble your faucet
Reassemble the faucet by putting the valve stem back. Tighten the screws and nuts using a wrench. Place the faucet handle back and screw it well.
Step 8: Turn the water on
Turn on your water supply and check if the leak persists. Consult a plumber if your faucet doesn’t work correctly, even after replacing the washers several times.
2. Unclogging a Drain
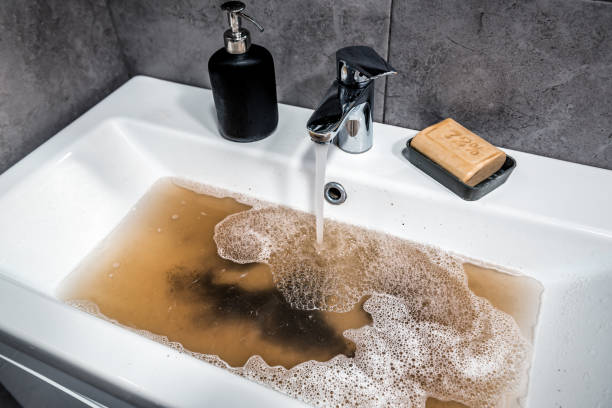
Did you know it’s possible to unclog drains without using harsh chemicals? There are various eco-friendly DIY drain unclogging methods for homeowners, including:
Using a plunger
You’ll need:
- Plunger
- 1-2 rags or towel
- A bucket (optional)
Steps
- Collect water and drain it into your sink using a bucket, rags, or towel.
- For double sinks, create a vacuum by concealing one of the drains with a moist cloth.
- Put your plunger on top of the drain, ensuring it covers the entire hole fully.
- Pour water into the basin until it reaches the plunger’s edge to improve the seal.
- Raise and lower the plunger for 20 seconds while maintaining the seal.
- Do the plunging quickly and repeatedly. Check from time to time to see if the water is draining.
- Pour/run hot water for about five minutes to clear residue and particles after the water drains successfully.
Using a drain snake
You’ll need:
- Drain/plumbing snake
- Bucket
- Rags or towels
- Rubber gloves
Instructions:
1. Preparation
Wear protective rubber gloves. Prepare your sink by collecting any water using buckets, rags, or towels and emptying it.
2. Remove your sink’s p-trap
Place a bucket under your sink to catch any leaking water. Loosen the slip nuts that secure the U-shaped part beneath your sink (p-trap). Then, take the P-trap out and check for dirt or obstruction.
3. Clean the P-trap
Remove any obstructions from your P-trap until it’s clean.
4. Insert the plumber’s snake
Once the P-trap is clean, insert the plumber’s snake into your drain pipe. Push it further down and turn the handle. Stop inserting the snake once you sense any resistance because it shows there’s a clog ahead.
5. Break down the clog
Turn the snake counterclockwise to free it from the obstruction. Push, pull, and rotate the snake gently to break the clog. Once you’ve done this, keep the handle turned and remove the snake gently.
6. Test and reassemble
Put the P-trap back to its rightful place. Double-check it to confirm it’s well-fitted. Run water and check if the drainage speed improves. Repeat the process if drainage remains slow.
7. Clean your plumber’s snake
Clean your snake and all other tools you use when unclogging your drain. Dispose of debris, rags, and the bucket you used.
Using Baking soda and vinegar
One of the most effective, affordable home plumbing tips involves using baking soda and vinegar. Here’s how to do it:
- Pour hot water down your drains to loosen debris.
- Tip half a cup of baking soda into your pipes, then pour half a cup of vinegar into them. This mixture breaks down the already moist grime, dirt, and buildup inside your pipes.
- Cover the drain with a rug, towel, or plug for an hour. You may also leave it overnight to enhance the reaction and effectiveness.
- Next, flush your pipes with hot water to remove all loosened debris. Repeat this process and use a plunger if the blockages persist.
3. Replacing a Showerhead

A functional showerhead saves water and upgrades your bathroom. It’s among the best water-saving tips for homeowners, but how can you go about this process?
What you’ll need:
- A new showerhead
- Plumber’s tape (Teflon tape)
- Pliers or a soft towel/cloth
- A wire brush, damp paper towels, or used toothbrush
- Ladder or stepping stool
- Adjustable wrench
Steps to replace the showerhead with new, water-efficient models:
1. Turn off the faucet
Ensure the water faucet is off to prevent running water from the old showerhead.
2. Twist off the old showerhead
Unscrew the old showerhead by turning it gently counterclockwise using your hands. Use pliers or wrenches to untwist the showerhead, which doesn’t turn easily. Be careful, as it can break.
3. Clean the extension pipe
After removing the old, faulty showerhead, brush the threads linking it to the extension pipe using an old toothbrush, wire brush, or damp cloth to wipe dirt off. Ensure the threads are dry before wrapping them with thread tape.
4. Wrap with a plumber’s tape
Wrap the threads clockwise from the base to the tips. Smoothen the tape between your fingers.
5. Attach the new showerhead
First, read the instructions on the new showerhead regarding how to fasten it to your wall. Next, place the shower replacement on your shower arm, add screws, and tighten as instructed. Use your hands to tighten it more.
6. Confirm for leaks
Angle the showerhead towards the wall. Turn on hot and cold water to see if it leaks. Confirm if the plumber’s tape is sufficient and if the rubber lining fits well.
4. Addressing Low Water Pressure
Faulty faucet aerators and clogged pipes are among the most common causes of low water pressure in your home. Aside from checking for leaks, cleaning your faucet aerators is another method to fix low water pressure.
Tools/materials needed:
- Pliers
- Masking tape
- Paper clip
- screwdriver (small size)
- Sewing needle
- Used or new toothbrush
- Vinegar
Clean up your aerators in these simple steps:
- Twist the aerator counterclockwise with your hands to remove it from the faucet spout.
- Use channel-lock pliers to remove the stuck aerator carefully.
- Feel the inside of the faucet spout with your fingers for any stuck debris and deposits. You can also use a screwdriver to check parts with mineral deposits.
- Clear any dirt or deposits from your faucet spout.
- Dissemble the aerator parts using a thin paperclip or toothpick.
- Rinse off large particles and use the paper clip to unblock holes in the screen.
- Next, soak all the parts of your faucet aerators in vinegar overnight or until the deposits soften. Once soft, remove with a toothbrush.
- Rinse the aerator parts and reassemble them appropriately.
- Reattach the aerator using screws to the spout by turning it counterclockwise. Tighten it firmly with your hands or pliers.
- Run water and watch out for leaks.
When to Call a Professional
While DIY plumbing fixes go a long way, they only offer solutions for minor plumbing issues. Despite your efforts to fix your home plumbing problems yourself, there are scenarios where the fixes won’t suffice. You’ll require professional plumbing help in the scenarios below:
- Sewer line issues: Call a licensed plumber if you suspect sewer line issues in your home.
- Major, persistent leaks: DIY fixes can only solve minor leaks. For significant water leaks, talk to a professional.
- Constant slow drains: If your drains move slowly despite using a plumber’s snake or plunger, contact a licensed plumber.
- High water bills: If you pay a higher-than-normal water bill, it’s a sign of a leak that your DIY fixes can’t address.
- Water shortages: Constant water shortages are a sign of a plumbing issue requiring the attention of a professional plumber.
Contact Us for Professional Plumbing Services
While DIY plumbing fixes save you money, they aren’t ideal for all plumbing issues. When you need a professional plumber to deal with complex problems, we are just a call away.
Our team of experienced plumbers is ready to provide professional help for all your plumbing-related issues. Whether you need a diagnosis or have been struggling with a broken sewer line for a while, we are ready to help.